
This is my first DIY, so please let me know if there are any missing steps or unclear directions.
I thought I would share the process for making pinhole cameras. I love the dreamy look that is created by the long exposures and huge depth of field. My favorite pinhole is my Holga, but there is always something extra special about one that I make myself.
Tools
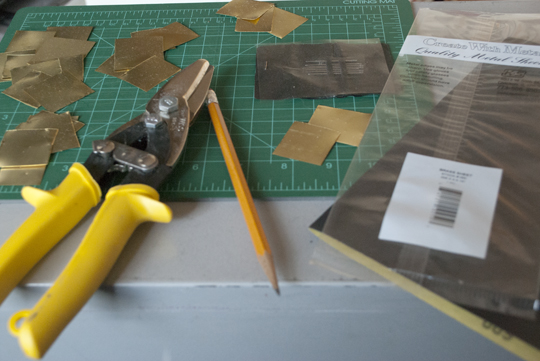
- Cookie tin or other light tight container
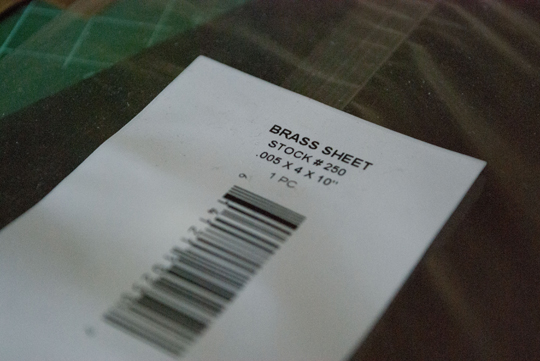
- Thin metal: I'm using brass that is .005" thick that I picked up for a few dollars at the art store
- Sand paper: I used 600 grit metal/wood paper
- Metal snips
- Pencil with an eraser
- Needles
- Hammer (not shown)
- Awl (not shown)
So I spray painted the insides of my cookie tin to minimize light bounce and I stenciled numbers on the top. The numbers are just for my own notes. I prefer to take many pinhole cameras out and about instead of simply having one shot and having to run back into the darkroom.
Step One
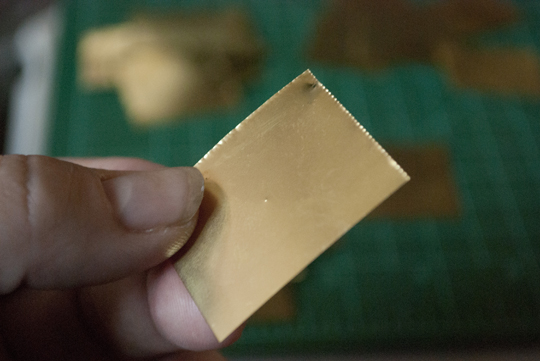
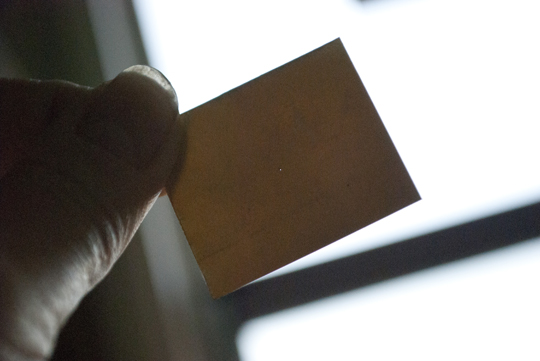
Cut squares of your metal using the snips. No need to measure, just make sure there's room around the edge for mounting. I ended up with 23 pinholes from my 4" x 10" sheet. Clearly they weren't all the same size.
Step Two
If you can find needles that are numbered, you can use a chart like this to determine your f-stop. I couldn't find the package I have stashed, but I'm OK with a little trial and error. I just used some regular hand sewing needles. Because I did, I can only estimate my f-stop. If that's a deal breaker for you, start with numbered needles.
Step Three
Push the eye end of the needle into the eraser of the pencil. This isn't absolutely necessary, but it makes pushing the needle into the metal a lot easier.

Step Four
Push the needle into the brass. The goal here is not to pierce all the way through but to make an indentation that you can feel from the other side You should be able to see the dimple, but not see through the metal.
Step Five
Turn the metal over and lightly sand the dimple away.
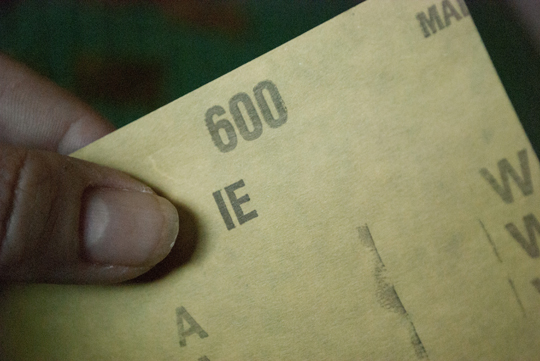
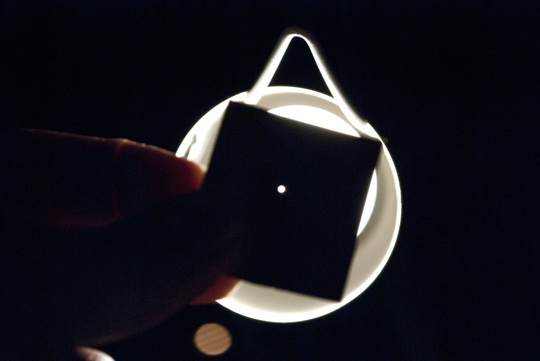
The metal dust can get stuck in the hole so I usually blow through it. Check that you can see through the hole by holding it up to a bright light. If you really want to see how acurate your pinhole is and you have access to a darkroom, put your pinhole in a negative carrier and check out how smooth the circle is.
This first photo gives you an idea of the size.
I also like to hold it up to a bright light or the sun to see if the circle looks good.
Step Six
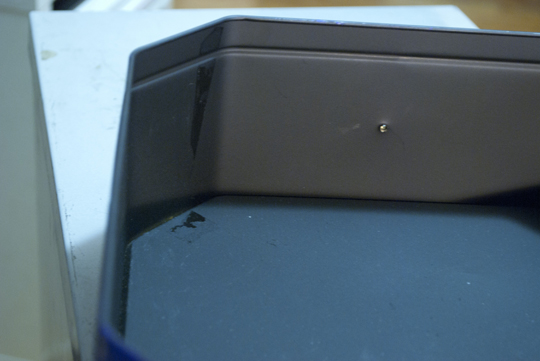
Most people cut a square out of their container, but I just didn't have the patience to do this much drilling and sawing. Also plan on putting multiple holes in each camera, so I want to maintain the structural integrity of the container. I place my pinhole where I want to mount it, and using the needle tip, scratch on the side. I take an awl and hammer a much larger hole from the outside in. I'm using a woodworking awl, not a bookbinding or leatherworking awl.
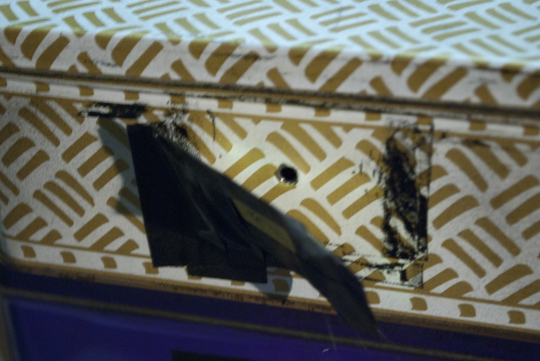
I mount the pinhole on the outside using gaff tape.
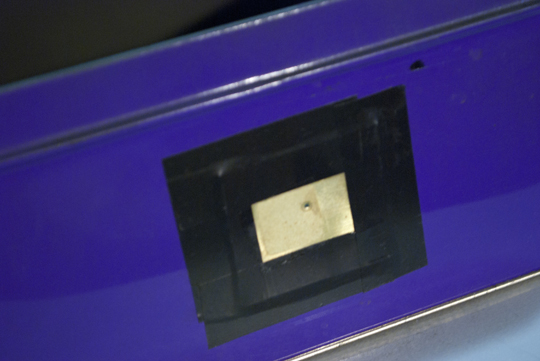
As you can see from these photos, I've used electrical tape in a pinch, but it is not very permanent and I've been replacing the electrical tape as it fails.
Don't forget an extra piece of tape to act as a shutter. I like to fold the end over a little so it's easy to find. Or if you have multiple colored gaff tape, contrast is great!
Step Seven
In the darkroom cut photo paper to fit inside your camera. While still in the darkroom tape the paper opposite the hole and put the lid on. Tape around the edges and you are ready to go!
Happy shooting!